Yuja is a video streaming and storage platform subscribed to by the University of Southern Mississippi (USM). It allows users to create and store videos in an online environment, and allows users to embed those videos into Canvas. The following is designed to get students started with Yuja. This guide will provide information on the basic functions of Yuja, how students can create videos with Yuja, and how students may use Yuja video content within Canvas.
See attached resource below:
Download TutorialAccessing Yuja
 Like Canvas, Yuja is a cloud (or internet) based software. Users must have internet access to use the product. The website for USM is usm.yuja.com. All users will come to a USM branded page with a login button in the top-right corner of the screen (see right).
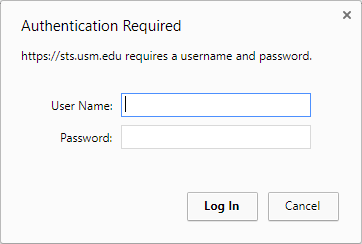 Yuja uses the same login credentials as most other software packages on campus (SOAR, Canvas, Office365). After clicking Login, users will see a username/password box appear as a pop-up (see right). The username is the users W-number (w########). The password is the same password the user uses for SOAR.
NOTE: this password box requires the users web browser to allow pop-up windows. This may require users adjust their browser security settings. The password box may also throw a security certificate error. Users must add/confirm the exception before they can login to Yuja.
After logging into Yuja, users are taken to a page called the Media Channel. The Media Channel displays any videos USM has made available to the everyone through Yuja. At the top of the Media channel is a navigation row with the following options (see below):
- View Channels – Returns users to the Media Channel page
- Create Recording – Opens the Capture & Live Stream tool
- Upload & Manage – Opens the users Media Library
![]()
Recording with Yuja
Students have the ability to create videos with Yuja, similar to the videos instructors may create with Yuja. Every USM students has an account on Yuja and every student account has a ½ gigabyte storage (512 MB). This is enough space for approximately 3 hours of recorded video. To create video with Yuja, students will select Create Recording from the navigation row on the Media Channel page (see above).
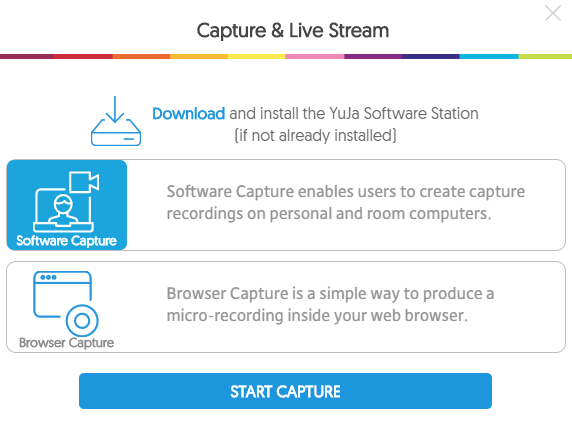 Create Recording opens the Capture & Live Stream tool, which contains the following options (see right): a Download link, Software Capture, and Browser Capture. Capture & Live Stream requires every user (students or instructors) to install the Yuja Software Station. The link to download this software is found at the top of this window. The system will automatically determine if the user is using a Mac, or a PC, and download the correct version of the software.
NOTE: if users are experiencing problems downloading or installing the Yuja Software Station, there are tutorial videos for each platform (Mac or PC) below the download link on the Install page.
After the software has been installed, users will return to the previous page and select the Start Capture option (see above). Users typically have two capture options available to them: Software and Browser Capture.
The Software capture uses the software previously installed on the user’s computer. It is the preferred method for recording videos with Yuja as it produces the best quality video. Select the desired option and click Start Capture.
NOTE: the web capture is still an option but produces a lower quality (or worse) video than the Software capture.
Users may be prompted to allow the browser to open the Yuja Software Station. Click Allow to open the software. Before users begin recordings, the Yuja Software Station will display various preview screens and options, and allow users to create a title and description for the video (see next page).
The row of text boxes across the top allows users to add a title and a description to the recorded video. By default, all recorded video will be stored in the users private My Media folder.
NOTE: The My Media folder is the correct destination for all student recordings.
The left column allows users to select the webcam (Video), microphone (Audio), and Screen (Screen) he/she wishes to record for the video. Users may click on any of the rows within that column and change the default options, or add additional options for the video.
Any selection options within the left column are displayed in the Previewing area, to the right of that column. The preview allows users to see what will be recorded prior to starting and ensures all Audio, Video, and Screen hardware are properly working.
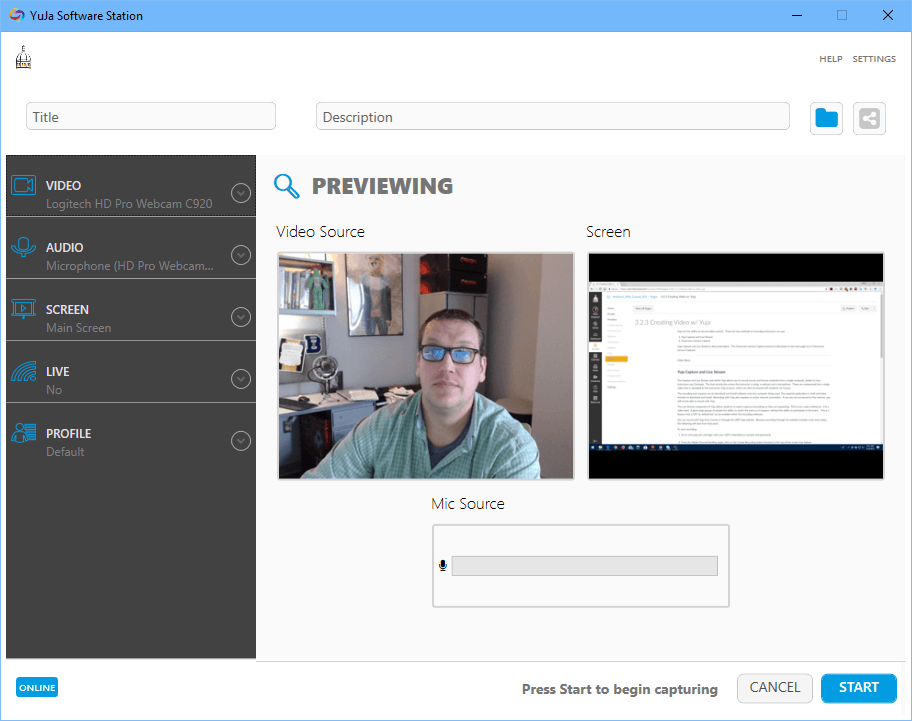
When the user is ready, he/she will click Start to begin recording.
![]() When the recording is on and active, a small control panel will appear in the bottom-right corner of the screen (see right). This allows users to open the software station control panel again, pause the recording, or stop the recording. When a user stops the recording, they have the option of saving the recording to Yuja or deleting it.
When the recording is on and active, a small control panel will appear in the bottom-right corner of the screen (see right). This allows users to open the software station control panel again, pause the recording, or stop the recording. When a user stops the recording, they have the option of saving the recording to Yuja or deleting it.
What is being Recorded?
The Yuja Software Station is recording three separate things: the screen, the webcam, and the microphone.
The Screen
The screen is being recorded through a process called Screen Capture. In essence, a video camera is pointed directly at the user’s computer screen and it is only recording that screen. The recording will capture any visual movements or demonstrations but will not record any audio that comes through the computers speakers. For example, if a user wished to record a PowerPoint presentation, he/she will complete the following steps:
- Open the PowerPoint presentation and the Yuja Software Station
- Start the recording
- Start the PowerPoint
- Present the PowerPoint
- Stop the recording
- Save the Video
Any/all visual components of the PowerPoint (i.e., transitions, animations, text, or images) will be recorded. Any audio narrations added directly to a PowerPoint slide will not. If the PowerPoint contains a video, the visual movement of the video will be recorded but the audio associated with the video will not.
The Webcam
Most laptop computer contain webcams built directly into the monitor. The webcam is a simple camera that visually records anything it is pointed at.
The Microphone
Most laptop computers contain a microphone built directly into the monitor. The microphone records any audio it detects. This audio may come from the user speaking, background noise, and/or other people or noises near the computer. Typically, microphones are not sensitive enough the pickup audio coming from the computers speakers. If any computer audio is recorded by the microphone, it is typically of poor quality.
Using Yuja with Canvas
Yuja is not directly connected with Canvas. However, users may still add videos created, and stored, on Yuja to a Canvas course. Students will primarily use Yuja videos for assignment submission and discussion participation. This section will focus on those two functions within Canvas.
Assignment Submission
![]() To start, students must navigate to the desired assignment and click the Submit Assignment button (see right).
To start, students must navigate to the desired assignment and click the Submit Assignment button (see right).
Yuja connects to Canvas through the “rich text editor.” This is the text box seen throughout various parts of the course (i.e., discussions, assignments, pages, etc.). On the rich text editor tool bar are a number of tools and applications, like inserting images, Office365, or TedEd. One of these icons is called More External Tools. This icon looks like a blue tringle, or arrow, pointing downwards (see right).
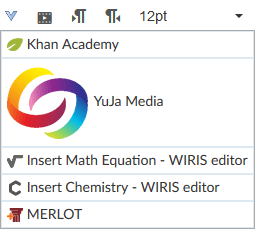 When this icon is clicked, a menu expands. Yuja is located on this menu (see right). When a user clicks on the Yuja link within the menu, a separate window will appear. This window connects the user to his/her storage area within Yuja and displays all videos he/she has access to.
To submit a Yuja video as an assignment, users will select a previously created video from the window that appears and embed that video into the text area.
When finished, click Submit.
NOTE: in order for students to turn Yuja videos in as an assignment in Canvas, the instructor must enable text entry as a submission option.
Discussions
Including Yuja video within a discussion board, or a discussion board post, is a similar process to submitting Yuja video as an assignment. Yuja connects to an assignment through the same rich text editor found in assignments. However, rather than clicking the Submit Assignment button, students will replay to the initial post within the discussion, or another user’s discussion post. All other steps are the same as listed above in the Assignment Submission section.
NOTE: users should record his/her video response before attempting to embed the video into a discussion post.